Hey all,
Evan Doody here with my first official blog post! This post has been a long time coming. With all of the exciting work going on and work left to do, blogging can quickly fall by the wayside. For that, we, the Wulverblade team, apologize.
I’m the team’s technical artist. It’s my job to make Mike’s art and our programming come together in wonderful ways. I also assist Mike with asset creation so he can focus his time where it’s needed most. With Mike busy capturing the majestic British landscape in extreme, stylized detail, the animations have fallen to me and our other animator Denis. The past few months I’ve been keeping my nose to the grindstone in our animation systems and thought it was about time share a glimpse of our process. Animations are a key aspect of the game’s combat experience and overall aesthetics. Due to the vast nature of this topic it’s easy for me to get sidetracked or start rambling so I will try to stay focus on the basics of the process.
Tool Update – Spine
In Brian’s first blog post about the development process and external development tools, he talks about the Unity plug-in Smooth Moves. Smooth Moves was extremely useful in getting our animations from flash into Unity and allowed us to edit them within the engine. However, we have since changed to an external application called Spine. Spine is a 2D skeletal animation tool by Esoteric Software designed specifically for use in 2D games. When we began our development, Esoteric Software was running their second Kickstarter for Spine. We kept a close eye on the project because it appeared to both meet our criteria and offer a slew of additional features that could be used to enhance our animations.
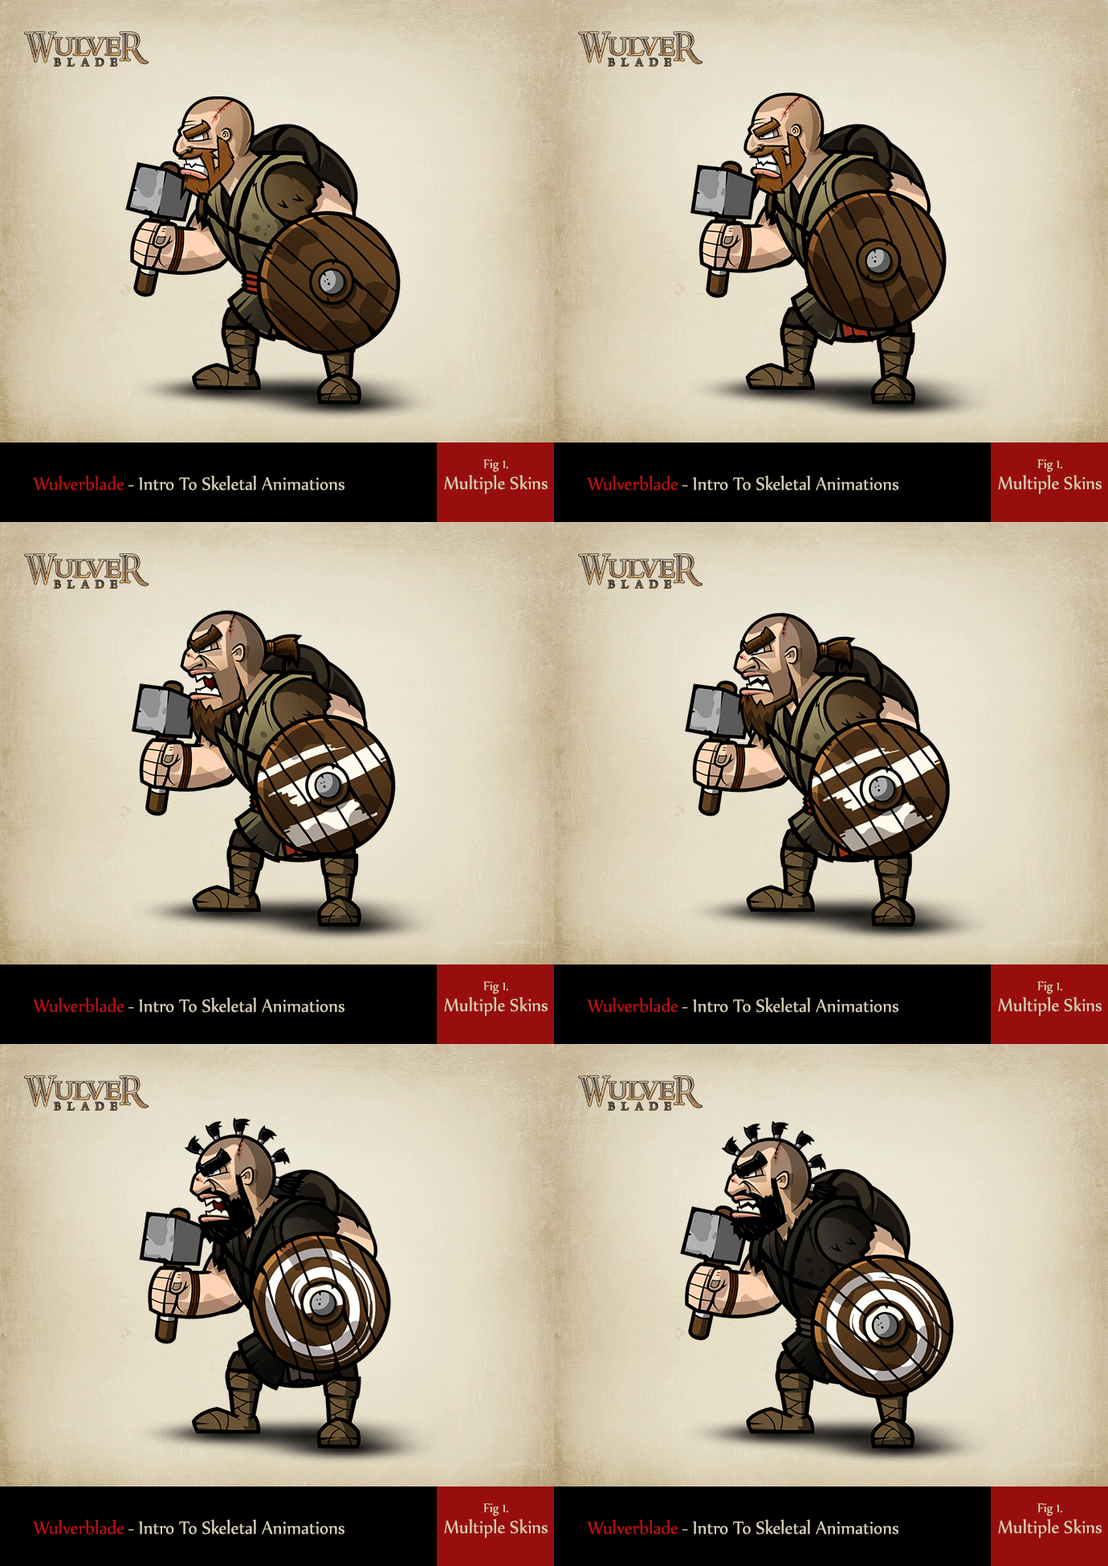
Spine is fast and fluid. Its interface is easy and intuitive. It allows for easy swapping of images per bone as well a keyable draw order. Multiple skins allow us to create an even wider variety of enemy appearances without needing a multitude of animation files. Most importantly, the guys at Esoteric Software provide a library of Spine Runtimes that allow for a smooth workflow between both Unity and 2D Toolkit, the 2D sprite system we chose to use. Combined with very regular updates and advanced features like skinning and mesh deformations, Spine was simply the best choice for us.
Initial Hurdle – Converting the Originals
Before we even began on the project, Mike had the characters designed and animated in Flash. By painstakingly cleaning and organizing the Flash files, we were able to export the animation information and import it into Smooth Moves. Unfortunately, Spine was a whole new beast. The characters were not initially designed with a skeletal hierarchy in mind.
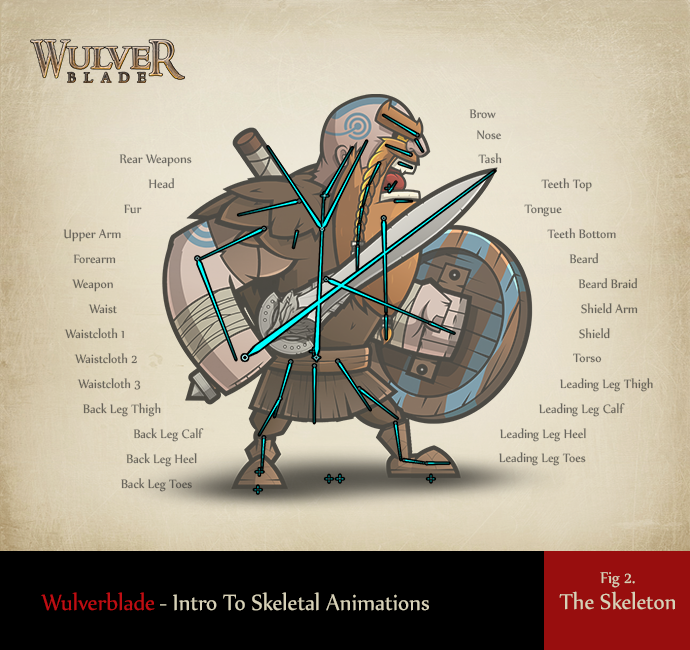
Although we were able to make the unrefined animations work with Smooth Moves, the change to Spine would mean a whole new layout for our characters. I had to figure out how each character’s skeleton would work. Once I had the skeleton built, the Flash files needed to be refined once again. At this point, Brian was able to (painfully) script an import tool for all of our characters and save the animations we had. This whole process had to be figured out relatively quickly as all other development was forced to a halt for the duration of the transition.
Preparing and Animating a New Character
With that tedium out of the way, let’s talk about the basics of animating a new character. For this post I’ll be using one of our newer enemies, the Roman Auxiliary. Historically, the Auxiliary were composed of conquered tribesmen seeking Roman citizenship. They were less formally trained and wore lighter armor than the traditional Legionnaires. From a game design standpoint, these enemies are an ideal transition from the wild, unorganized tribesmen to the heavily armored, well trained formations of the Legionnaires.
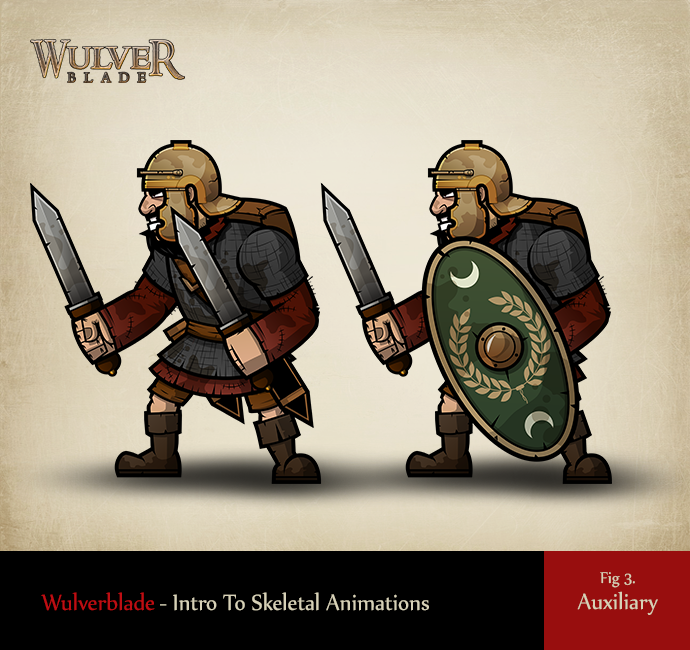
Mike still uses the same character design process described in his earlier blog post. He does a great job of organizing his characters with their necessary articulation in mind (e.g. overlapping the knee and thigh so the leg can bend without breaking.) He also positions the character in a number of key poses. This helps him figure out how his assets will work in the skeleton, and if he needs to make any additional images for a specific slot on the character. A completed character is delivered to me in the form of an Adobe Illustrator file. At this point I do three things: plan the character’s skeleton, match the scale of the enemy to Caradoc, and break apart the assets.
The enemy characters’ designs throughout development has been steadily improving. Thankfully, their skeletal structure has remained relatively similar, allowing me to maintain a consistent naming convention. Naturally, some characters do require extra bones for additional armor, weapons, or random details and these are added accordingly.
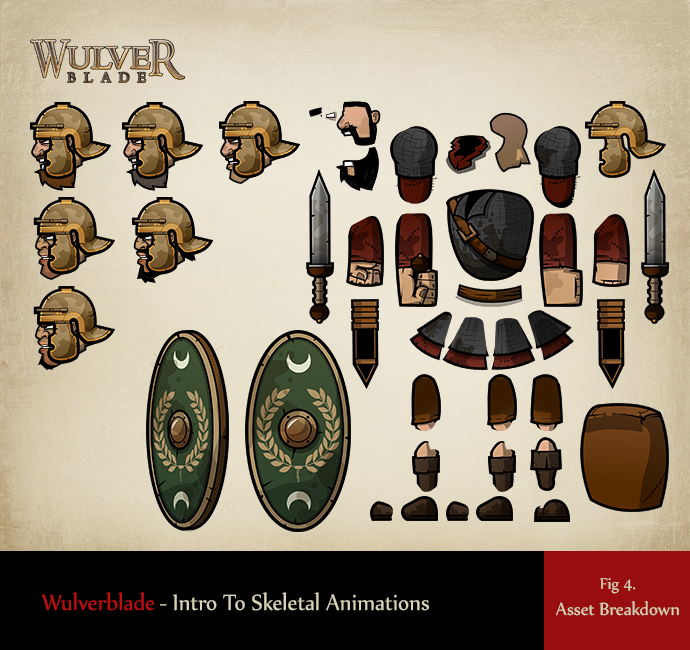
With the skeleton planned, I need to get each asset for each bone out of the illustrator file. This requires each asset be separated into its own PSD, exploding the character apart like a scene from the Bodyworlds “Exploded Man” exhibit (Fig 4). The assets remain as smart objects in the PSD to retain their original vector information. Adobe’s smart objects are extremely powerful. By maintaining all vector layers, we’re able to freely upscale or downscale the assets as needed without any loss of quality.
In Spine, each of these individual part gets its own slot under the appropriate bone. Certain images remain disabled until a specific animation needs them. At this point, the character is ready for animation! Many animations have become standardized: falling, kneeling, getting hit, or being grappled, to name a few. These are able to be made quickly and easily with only minor personalized tweaks. It’s in the characters walk, run, stance, and attacks where the characters personality shines through.
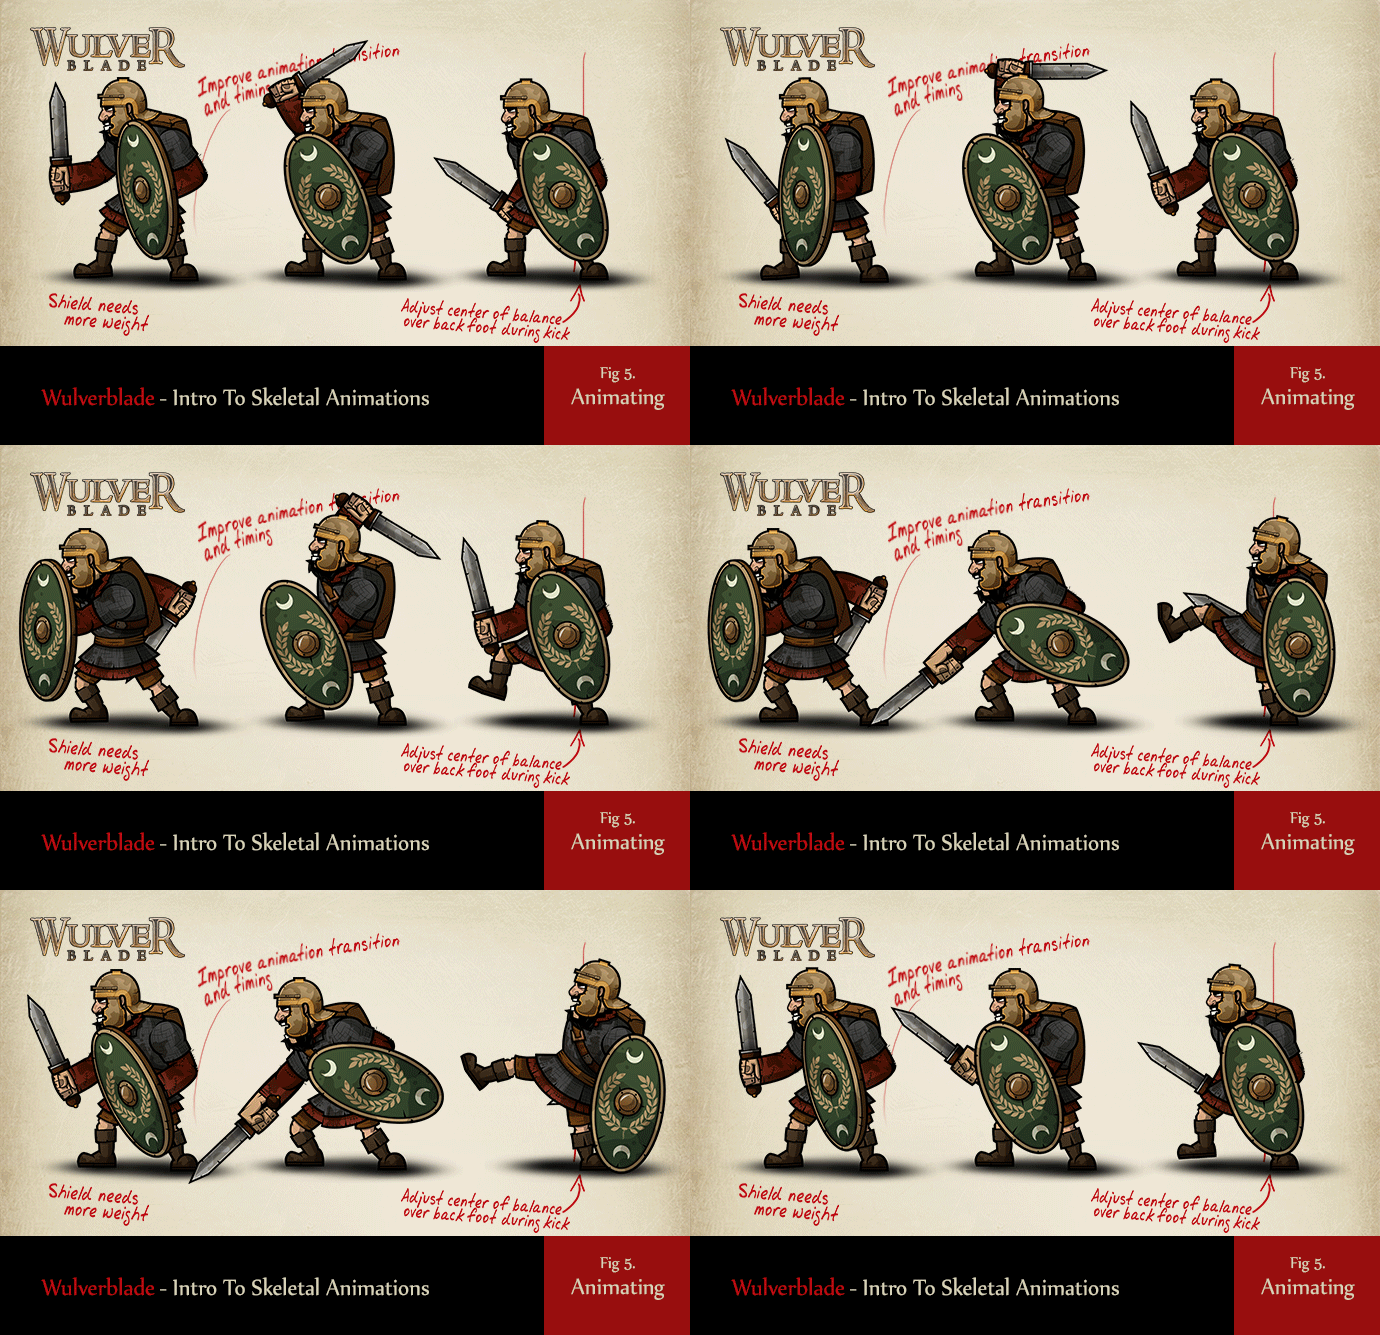
Developing our animations is an evolving process, constantly being tweaked and adjusted. The Spine file calls the events in game indicating when to play a sound, when an attack does damage, when the player can be interrupted, and a whole lot more. Each character design gets better, each character rig gets better, and Spine continues to improve and impress.
Here seems as good a spot as any to end this post. I know it was long overdue and a lot of information. If you guys have any questions, I encourage you to sound out in the comments! To keep myself on schedule with the blog, I’ve already started work on a number of future posts. They won’t be nearly as long or as broad as this one; instead I’ll be going into greater depth on some really interesting things we’ve been doing. Here’s a list of some of those topics in no particular order. Let me know in the comments which one(s) you’d like to see first.
- Mesh vs. Frame Animation – Texture Space, Smoothing, and Swipes
- Shadows – Problems, Solutions, and the next step
- Advanced Skeletal Animation and Rigging – Sort Ordering, Faces, and IK Rigging
- Blocking – Have Shield, Will Block
- Level Building – Building the Beasts
Until next time, thanks for reading!
– Evan
